Today, you will discover the mouthwatering world of Brazilian cuisine as we delve into the delicious traditional Vatapá recipe. With its origins deeply rooted in the rich culinary heritage of Brazil, this delectable dish is a true testament to the country’s love for bold flavors and vibrant ingredients. From the tantalizing blend of aromatic spices to the creamy consistency that leaves your taste buds dancing with joy, Vatapá is a must-try for any food enthusiast. So, grab your apron and get ready to embark on a culinary adventure unlike any other.
Traditional Vatapá Recipe
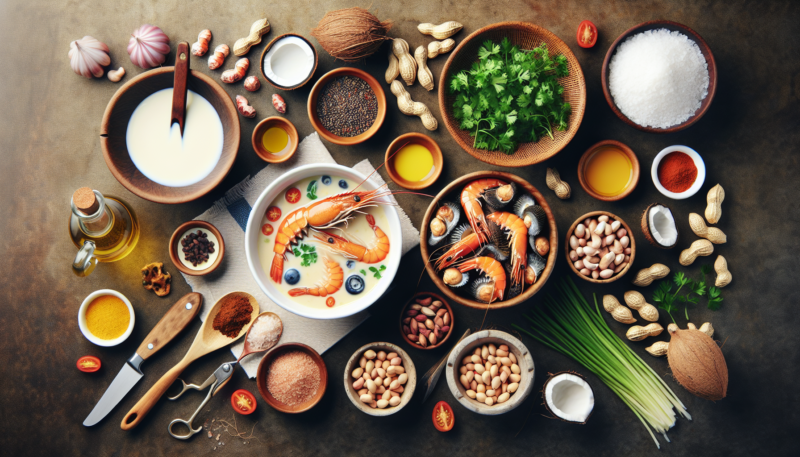
Welcome to this friendly article that will guide you through the delicious and traditional Vatapá recipe. Vatapá is a popular and flavorful Brazilian dish that combines the richness of seafood, the creaminess of coconut milk, and the earthiness of ground nuts. With its roots in Afro-Brazilian cuisine, Vatapá is a true culinary delight that will transport you to the vibrant streets of Brazil. So put on your apron, gather your ingredients, and let’s get cooking!

Ingredients
To prepare the mouthwatering Vatapá, you will need the following ingredients:
- Dried shrimp
- Dried salted codfish (optional)
- Onion
- Garlic
- Peanuts
- Cashews
- Bread
- Coconut milk
- Palm oil
- Red palm oil (optional)
- Fresh cilantro
- Malagueta peppers (optional)
- Lime juice
- Salt
Each of these ingredients plays a crucial role in creating the unique flavors and textures that define Vatapá. Feel free to make any necessary substitutions based on your personal preferences or dietary restrictions. Now, let’s dive into the preparation process!
Preparation
The preparation of Vatapá can be divided into six main steps: soaking the dried shrimp, preparing the shrimp paste, preparing the main ingredients, making the Vatapá paste, cooking the Vatapá, and serving the final dish. Let’s explore each step in detail to ensure that your Vatapá turns out to be a culinary masterpiece!
Step 1: Soaking the Dried Shrimp
Before we start cooking, we need to soak the dried shrimp to soften them. This will help them blend seamlessly into the dish and enhance its flavor. To do this, follow these simple steps:
- Place the dried shrimp in a bowl.
- Cover the shrimp with water.
- Let it soak for about 30 minutes.
- Drain the water and set the shrimp aside until needed.
Step 2: Preparing the Shrimp Paste
The shrimp paste is a crucial element in Vatapá, adding a distinct seafood flavor to the dish. Here’s how you can prepare it:
- In a blender or food processor, add the soaked dried shrimp.
- Add one chopped onion, a few cloves of garlic, and a handful of peanuts and cashews.
- Blend the ingredients until they form a thick paste.
- Set the shrimp paste aside for later use.

Step 3: Preparing the Main Ingredients
Now it’s time to prepare the main ingredients of Vatapá, which include onions, garlic, bread, and coconut milk. Let’s get started:
- Chop the onions and garlic finely.
- Cut the bread into small cubes or tear it into pieces.
- In a separate bowl, mix the bread with coconut milk and set it aside to soak.
Step 4: Making the Vatapá Paste
The key to achieving Vatapá’s rich and creamy consistency lies in making the Vatapá paste. Follow these steps to create the paste:
- Heat a pan or skillet over medium heat and add palm oil.
- Once the oil is hot, add the chopped onions and garlic. Sauté until they become translucent.
- Add the shrimp paste and continue cooking for a few minutes, stirring constantly.
- Gradually add the soaked bread and coconut milk mixture to the pan, stirring well.
- If desired, add some red palm oil for a deeper color and flavor.
- Finally, add fresh cilantro, malagueta peppers for a spicy kick, lime juice, and salt to taste.
- Cook the mixture, stirring occasionally, until it thickens to a creamy consistency. This usually takes about 10-15 minutes.
Step 5: Cooking the Vatapá
With the Vatapá paste prepared, it’s time to cook it to perfection. Here’s how you can achieve that:
- In a large pot, bring the Vatapá paste to a gentle simmer over low heat.
- If using dried salted codfish, add it to the pot and gently mix it into the sauce.
- Allow the flavors to meld together by cooking the mixture for about 20-30 minutes.
- Stir occasionally to prevent sticking and ensure even cooking.
Step 6: Serving the Vatapá
Congratulations! Your Vatapá is now ready to be served. Follow these steps to present it in the most appetizing way:
- Remove the pot from the heat and let the Vatapá cool slightly.
- Serve the Vatapá in bowls or on plates, accompanied by steamed rice or traditional Brazilian acarajé.
- Garnish with fresh cilantro leaves and a squeeze of lime juice for added freshness.
- You can also serve it with additional hot sauce if you want to intensify the spiciness.
Variations and Tips
While this traditional Vatapá recipe is divine as it is, there are several variations you can explore to suit your taste preferences or dietary needs. Here are some suggestions:
- Vegetarian Vatapá: Omit the dried shrimp and salted codfish, and replace them with tofu or vegetables like mushrooms and bell peppers.
- Gluten-free Vatapá: Substitute regular bread with gluten-free bread or bread crumbs.
- Creamier Vatapá: Increase the amount of coconut milk to make the dish even creamier.
- Adjust the spiciness: Control the level of spiciness by adding more or fewer malagueta peppers or using a milder pepper variety.
When cooking Vatapá, here are a few tips to keep in mind:
- Remember to adjust the seasoning according to your taste preferences throughout the cooking process, adding more salt, lime juice, or spices as needed.
- Be mindful of the consistency of the dish while cooking. If it becomes too thick, you can add a small amount of water or coconut milk to thin it out.
- Leftover Vatapá can be refrigerated for a few days and reheated when ready to enjoy. The flavors often intensify with time, making it even more delicious.
Conclusion
Congratulations! You have successfully learned how to prepare the traditional Vatapá recipe. This delightful Brazilian dish showcases the vibrant and diverse flavors of Afro-Brazilian cuisine. Now, it’s time to gather your friends and family, serve up a bowl of Vatapá, and let them savor the deliciousness of this traditional Brazilian delicacy. Enjoy and bom apetite!