Imagine sinking your teeth into a crispy, golden-brown exterior, revealing a mouthwatering filling of tender shredded chicken and creamy cheese. This is the delight that awaits you with our irresistible Coxinha recipe. Originating from Brazil, Coxinha is a popular street food that has won the hearts and taste buds of people around the world. In this article, we will take you on a culinary journey, providing you with step-by-step instructions to recreate this delectable dish in the comfort of your own kitchen. Get ready to indulge in a taste sensation like no other!
Coxinha Overview
Coxinha is a savory Brazilian snack that has gained popularity worldwide for its delicious taste and unique shape. Shaped like a chicken leg, Coxinha is a deep-fried delight filled with seasoned chicken and traditionally enjoyed as a finger food. In this article, we will explore the origin of Coxinha, the traditional ingredients used, and provide a comprehensive guide on how to prepare and enjoy this scrumptious Brazilian treat.
Origin of Coxinha
Coxinha, meaning “little thigh” in Portuguese, is believed to have originated in Brazil in the late 19th century. The snack’s unique shape was inspired by the chicken drumstick, as a way to pay homage to the country’s love for poultry. Although its exact origin remains a topic of debate, Coxinha is widely believed to have been popularized in the state of São Paulo and has since become a beloved staple in Brazilian cuisine.
Traditional Ingredients of Coxinha
Coxinha’s delectable flavor is derived from a combination of simple yet flavorful ingredients. The traditional recipe requires the following ingredients:
Chicken Breast
Boneless chicken breast is typically used as the base for the filling of Coxinha. It is cooked until tender and then shredded to create a succulent and flavorful filling.
Onion
Finely diced onion adds a subtle sweetness and depth of flavor to the filling. It is sautéed with the chicken to enhance the overall taste.
Garlic
Minced garlic adds a delightful aroma and a hint of pungency to the filling. It elevates the flavors and contributes to the overall savory profile of the Coxinha.
Bay Leaves
Bay leaves are added while cooking the chicken to infuse a subtle herbal note. This fragrant ingredient enhances the taste of the filling and lends a pleasant aroma.
Chicken Broth
Chicken broth is used to cook the chicken breast, adding moisture and ensuring a tender and juicy texture. It also imparts additional flavor to the filling.
Butter
Butter is used to sauté the onion and garlic, enhancing their flavors and imparting a rich and creamy essence to the filling.
All-Purpose Flour
All-purpose flour is the main ingredient in the dough of Coxinha. It provides the structure and texture required for shaping the snack.
Milk
Milk is used to bind the dough together and create a smooth consistency. It adds moisture and richness to the dough, resulting in a tender Coxinha.
Salt
Salt is an essential component to enhance the overall taste of Coxinha. It is added to both the filling and the dough to ensure a well-seasoned snack.
Black Pepper
Ground black pepper adds a subtle heat and depth of flavor to the filling. It complements the other ingredients and adds a pleasant kick to the Coxinha.
Now that we have explored the traditional ingredients used in Coxinha, let’s delve into the step-by-step process of preparing this mouthwatering snack.
Preparation
Cooking the Chicken
To start, cook the chicken breast in a pot of boiling water with bay leaves until it is tender and fully cooked. This process usually takes around 20-25 minutes. Once cooked, remove the chicken from the pot and set it aside to cool.
Shredding the Chicken
Once the chicken has cooled down, shred it into small, bite-sized pieces using a fork or your hands. Ensure that the chicken is finely shredded for a pleasant texture in the filling.
Preparing the Dough
In a separate pan, melt butter over medium heat and sauté the diced onion until translucent. Add the minced garlic and sauté for another minute until fragrant. Then, add the all-purpose flour and stir continuously until it forms a thick paste.
Shaping the Coxinhas
To shape the Coxinhas, take a small portion of the dough (approximately the size of a golf ball) and flatten it with your hands. Place a spoonful of the chicken filling in the center of the dough and gently fold it, forming a teardrop shape resembling a chicken drumstick. Ensure that the filling is completely encased by the dough to prevent any leakage during frying.
Now that you have mastered the preparation of Coxinha, let’s move on to the filling and dough details.
Filling
Cooked Chicken
The cooked and shredded chicken serves as the star ingredient in the filling of Coxinha. It provides the primary flavor and adds a succulent texture to the snack.
Onion
Finely diced onion is sautéed until translucent to enhance its natural sweetness. It creates a harmonious balance of flavors when combined with the other ingredients.
Garlic
Minced garlic adds a delightful aroma and depth of flavor to the filling. It infuses the chicken with an irresistible taste and enriches the overall experience of enjoying Coxinha.
Seasoning
Coxinha’s filling is typically seasoned with salt and black pepper to enhance the flavor profile of the snack. The seasoning can be adjusted according to personal preference.
Optional Ingredients
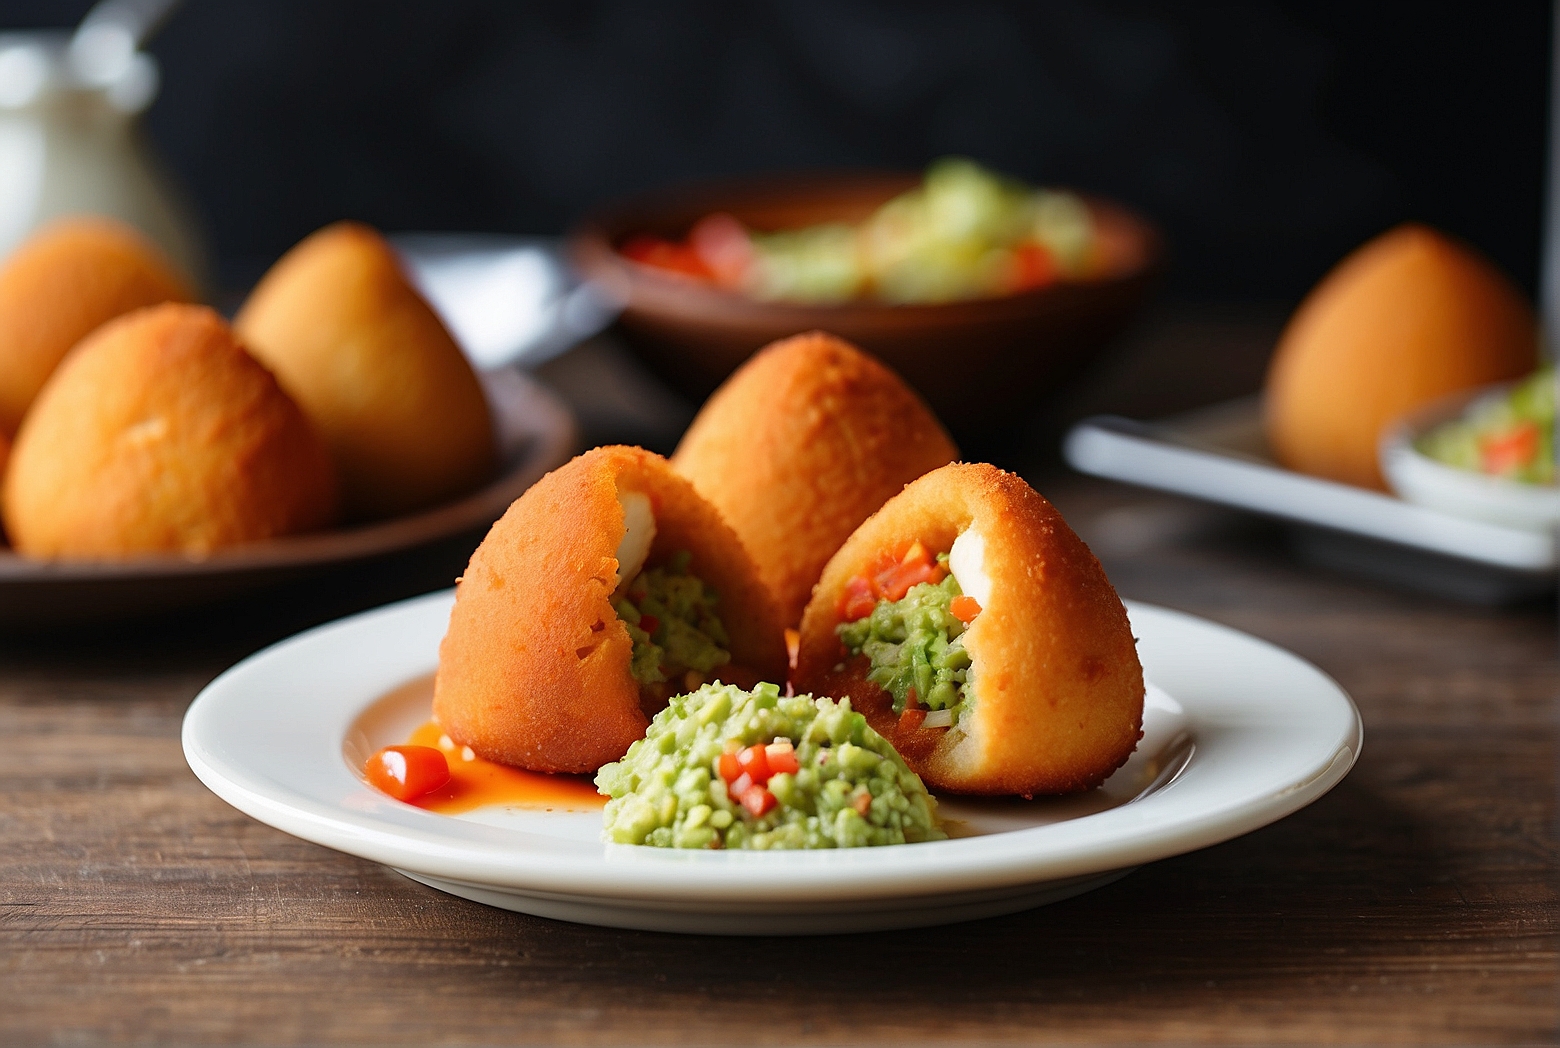
While the traditional Coxinha recipe focuses on the classic chicken filling, there are endless variations to explore. Some popular optional ingredients to consider include cheese, cream cheese, bacon, and herbs such as parsley or cilantro. These additions can elevate the flavor and provide a unique twist to the filling.
With the filling prepared, it’s time to delve into the details of the dough.
Dough
Preparation of Dough
To prepare the dough for Coxinha, begin by combining the all-purpose flour, milk, and a pinch of salt in a saucepan. Stir the mixture over medium heat until it forms a smooth and elastic dough. This process usually takes around 5-8 minutes.
Cooking the Dough
Continue stirring the dough over low heat for another 2-3 minutes until it pulls away from the sides of the pan. Transfer the dough to a clean surface and let it cool for a few minutes until it is easy to handle.
Tips for a Smooth and Elastic Dough Texture
To achieve a smooth and elastic texture in the dough, it is important to stir continuously while cooking it over low heat. This prevents the formation of lumps and ensures a cohesive and workable dough for shaping the Coxinhas.
Now that the dough is prepared, it’s time to shape the Coxinhas and turn these delicious morsels into a reality.
Shaping the Coxinhas
Step-by-Step Process
To shape the Coxinhas, start by taking a small portion of the dough and flattening it in your palm. Place a spoonful of the chicken filling in the center of the dough. Then, fold the dough over the filling, forming a teardrop shape resembling a chicken drumstick. Gently pinch the edges of the dough together to seal it, ensuring that the filling is completely enclosed.
Different Shaping Techniques
While the traditional teardrop shape is the most common way to shape Coxinhas, there are other variations that can be explored. Some people prefer a cylindrical shape, similar to a croquette, while others may opt for a round or oblong shape. The choice of shaping technique is purely based on personal preference and does not impact the taste or texture of the final product.
Now that the Coxinhas are shaped, it’s time to fry them to perfection.
Frying the Coxinhas
Choosing the Right Oil
When frying Coxinhas, it is important to choose an oil with a high smoke point, such as vegetable or canola oil. This ensures that the oil does not break down at high temperatures and imparts a pleasant flavor to the snack.
Ideal Temperature for Frying
Heat the oil in a deep pan or a fryer to a temperature of around 350°F (180°C). This temperature allows the Coxinhas to cook evenly and develop a crispy golden-brown exterior.
Step-by-Step Frying Process
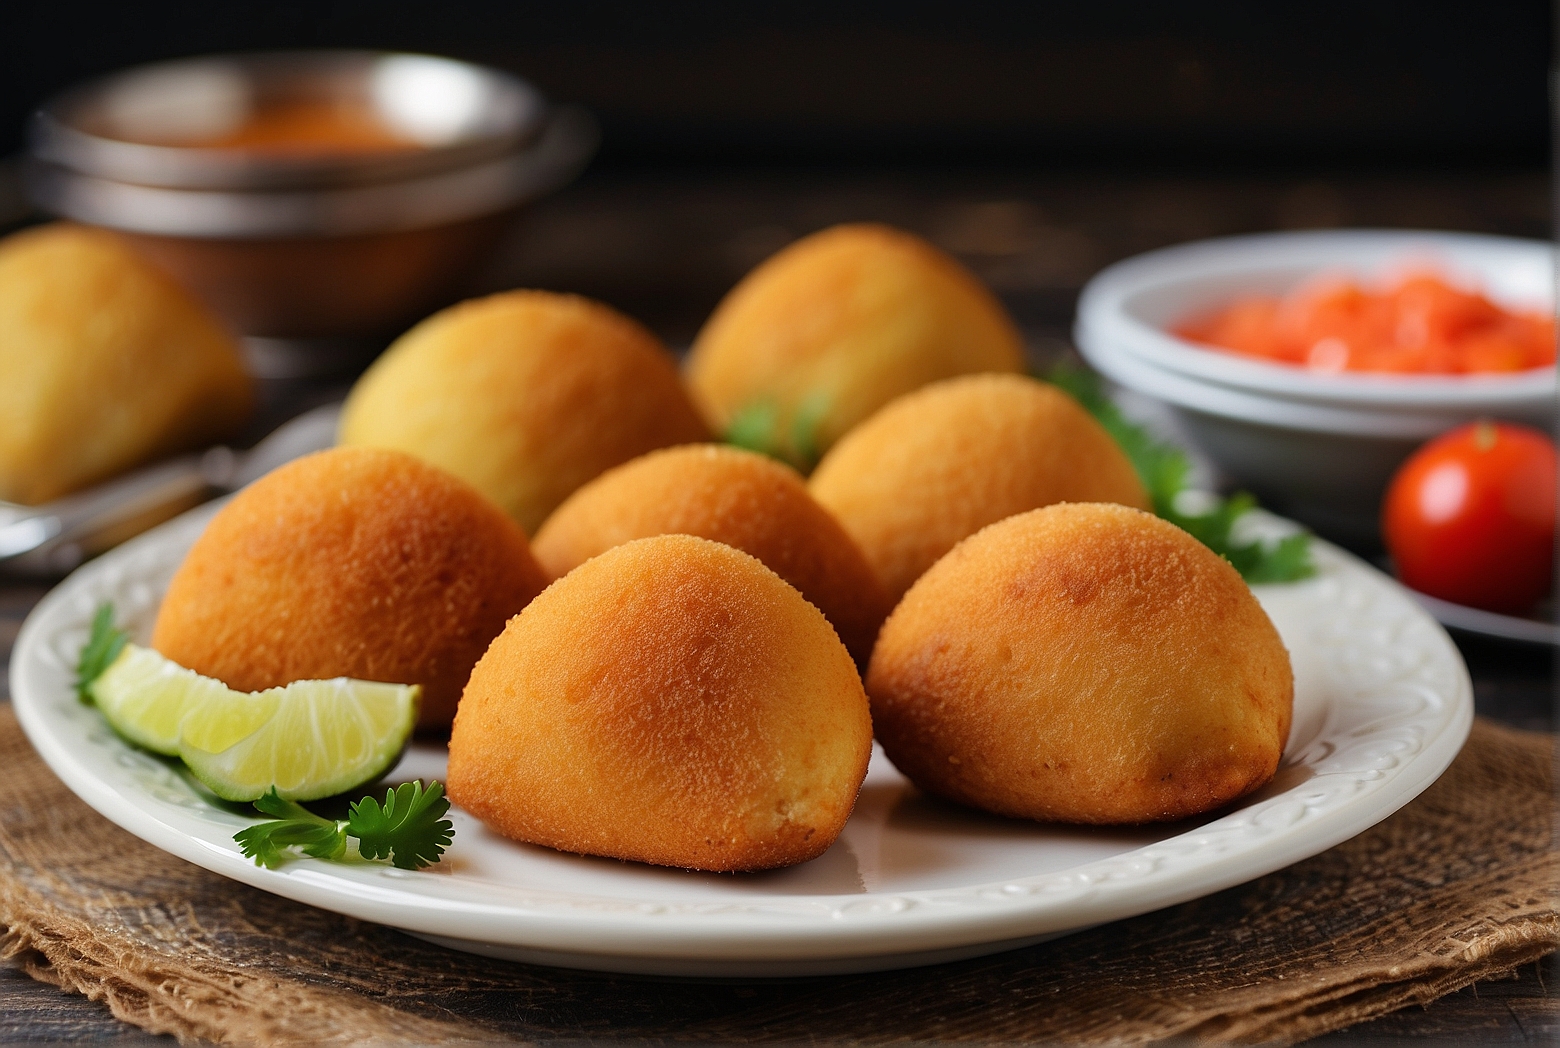
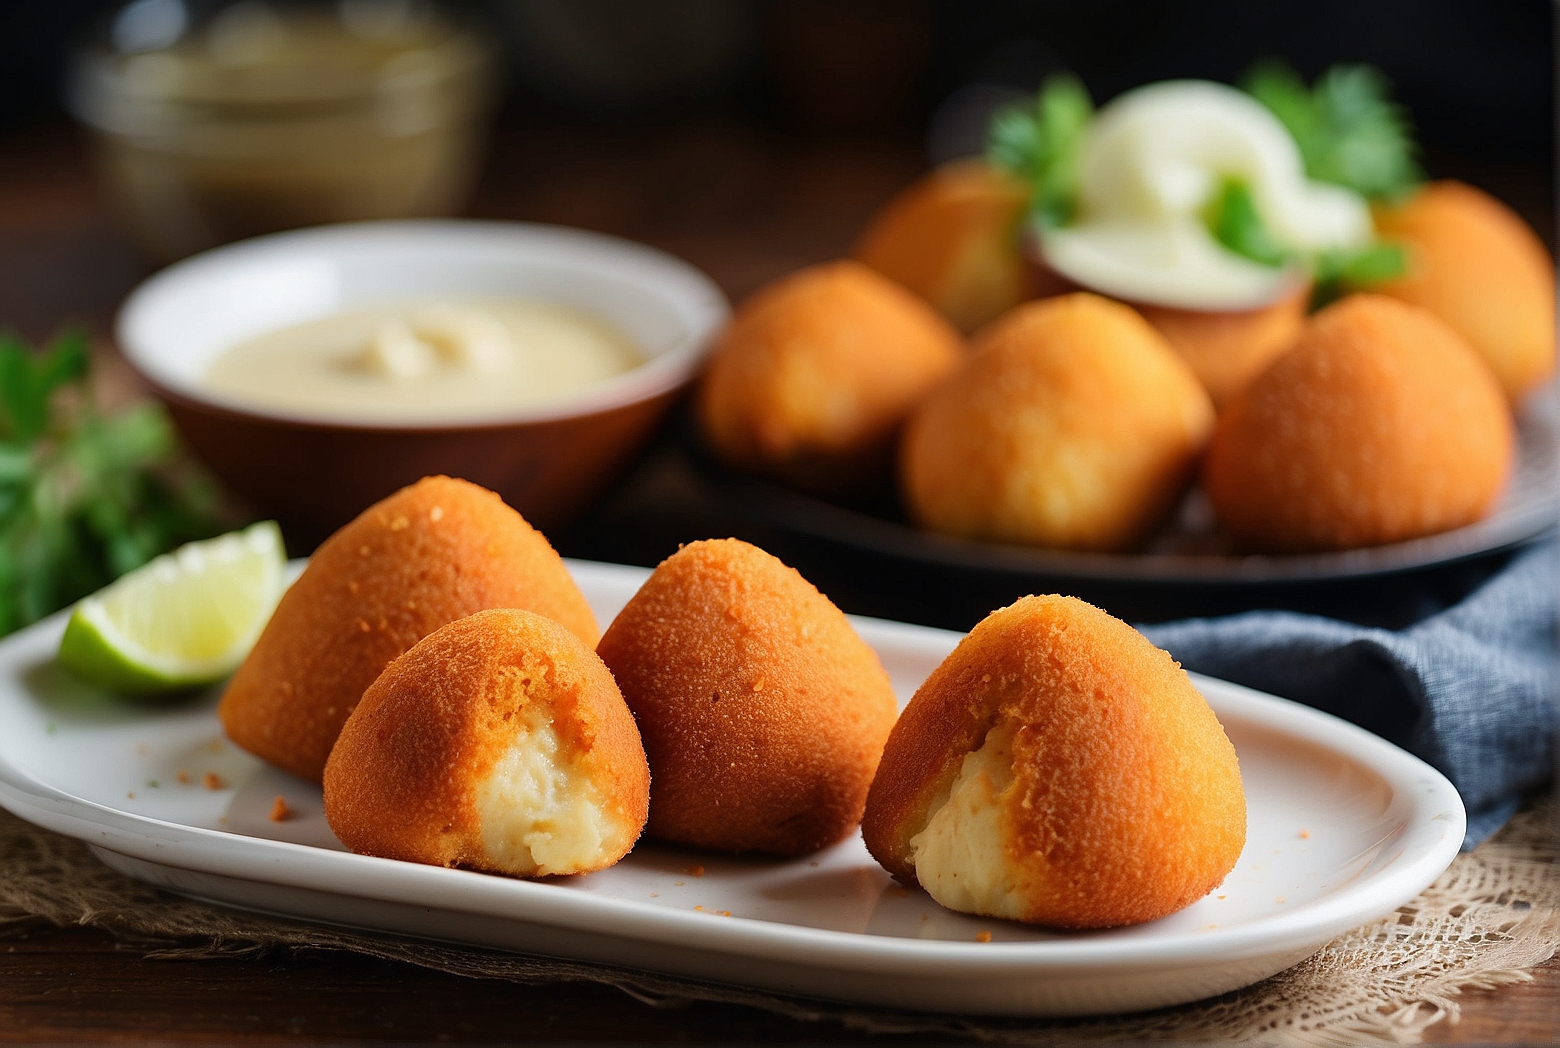
Carefully lower the shaped Coxinhas into the hot oil using a slotted spoon or tongs. Fry them in batches for approximately 5-7 minutes, or until they turn a deep golden brown color. Once cooked, remove the Coxinhas from the oil and transfer them to a paper towel-lined plate to absorb any excess oil.
Now that the Coxinhas are fried to perfection, it’s time to serve and enjoy this delightful Brazilian snack.
Serving and Enjoyment
Garnishing
Coxinhas can be garnished with a sprinkle of finely chopped parsley or cilantro for a fresh and vibrant touch. This adds a pop of color and enhances the visual appeal of the snack.
Dipping Sauces
Coxinhas pair exceptionally well with a variety of tangy or spicy dipping sauces. Some popular options include hot sauce, aioli, barbecue sauce, or a traditional Brazilian molho sauce made with mayonnaise, ketchup, and lime juice. Experiment with different flavors to find your perfect accompaniment.
Ideal Sides for Coxinhas
Coxinhas are versatile and can be enjoyed as a standalone snack or as part of a larger meal. They are often served with a side of crispy French fries, a light salad, or even as a tasty addition to a Brazilian feijoada, a traditional black bean stew. Let your creativity soar and pair Coxinhas with your favorite sides for a delightful culinary experience.
Variations and Alternatives
Vegetarian Coxinhas
For those with dietary preferences or restrictions, vegetarian Coxinhas are an excellent option. The chicken filling can be replaced with a combination of vegetables, tofu, or plant-based protein alternatives. The rest of the recipe remains the same, ensuring a delicious and satisfying snack for everyone.
Gluten-Free Options
To accommodate gluten-free diets, traditional all-purpose flour can be substituted with gluten-free flour blends or alternative flours like almond flour or tapioca flour. These options yield excellent results while keeping the Coxinha gluten-free.
Other Fillings to Try
While the classic chicken filling for Coxinha is undoubtedly delightful, there are countless other fillings to explore. Some popular alternatives include cheese, shrimp, beef, or even a combination of your favorite ingredients. Get creative and experiment with different flavors to personalize your Coxinha experience.
Coxinha Etiquette
Traditional Way of Eating Coxinhas
In Brazil, Coxinhas are typically enjoyed as a finger food, held in one hand while taking small bites from the top. This allows you to savor the combination of the crispy exterior and the flavorful filling. Avoid biting into the pointed end, as it may contain excess filling that could lead to a messy eating experience.
Sharing Coxinhas with Friends and Family
Coxinhas are often served at social gatherings, barbecues, and celebrations in Brazil. Sharing these delectable snacks with friends and family creates a sense of togetherness and joy. Consider preparing a batch of Coxinhas to share with loved ones and enjoy the collective delight they bring to any gathering.
In conclusion, Coxinha is a beloved Brazilian snack that combines flavorful ingredients, a unique shape, and a delightful eating experience. By following this comprehensive guide, you can now confidently prepare and enjoy Coxinhas in the comfort of your own home. Whether you opt for the traditional chicken filling or venture into new flavors, Coxinha is sure to leave a lasting impression on your taste buds. So, gather your ingredients, roll up your sleeves, and embark on a culinary adventure with this irresistible Brazilian treat. Bom apetite!